

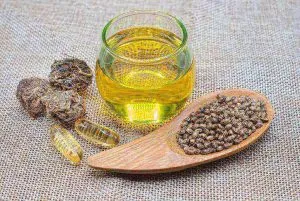
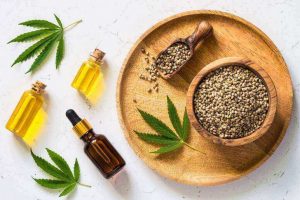
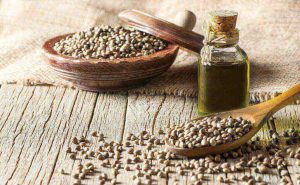
Step by Step Growing Cannabis Seeds

Table of Contents
Buying ready-to-consume weed is probably the fastest way to indulge yourself with the greatness of cannabis. Many online stores offer convenient transactions for your purchases. Surely, you can save much time and effort by resorting to that. But, what if your desired cannabis weed is not available anywhere no matter how thorough you scout the internet? Will you sulk in dismay? Or will you take on the challenge and grow cannabis seeds yourself?
Grow Your Own Cannabis Seeds
If you are a hardcore cannabis fan and you want to have a constant supply of your favorite cannabis weed, or if you are a seller who had just decided to stop relying on a third-party producer, or if you are simply curious how fun it would be to grow your own cannabis seeds, then you are reading the right blog! This informative post is all that you have been looking for! As you progress, you will have answers to the following FAQs:
- How to start growing cannabis seeds?
- How long does it take to grow cannabis from seed?
- What are the best cannabis seeds to grow indoors?
At the end of this post, you will probably end up asking yourself, “Why have I not switched to growing my own cannabis a long time ago?”
No worries! Now is the perfect time to grow marijuana seeds! As many people are stuck in their homes because of the travel restrictions due to the pandemic, new hobbies are being developed which include planting. Planting can have many great effects not just on the environment but also on the well-being of the planter. It has been found to build self-esteem, reduce stress and induce happy hormones. Simply put, planting is good for your mental health! And what a better way to incorporate your love for cannabis and your newfound hobby that is planting than to grow your own cannabis seeds!
Best Soil for Growing Cannabis Seeds
An important question when you’ve finally decided to start to grow marijuana seeds would be “What is the best soil for growing cannabis seeds?” Not all strains have the same soil preference. And not all soils are suitable for cannabis cultivation. There are many factors to consider like your climate, the type of seeds you are growing, whether you’re cultivating indoors or out, and many more.
To look for the best soil for your planting journey, you have to take into account the texture, water retention, drainage ability, pH value, and nutrients of the soil. Cannabis seeds prefer loose and light soil to promote root development as more oxygen can enter the roots. With that, the soil must have great drainage for the water not to pool on top of the soil. However, it must not drain all the way. Water retention is also important for the soil to hold sufficient water for the roots. You will also have to keep the pH levels of your soil within 5.8 to 6.3. Cannabis thrives best on low pH levels. And most importantly, your soil also needs nutrients for the plant to attain its optimal condition. Commercial soils already have nutrients in them, but they only last for about 4 weeks. So adding nutrients manually is a must as the plant begins to flower. If you want to go the long way, you can opt not to add nutrients and add humus, worm castings, guano, and compost instead.
4 Types of Soils
If you don’t have enough time to go the long way in feeding your soil, you can opt to buy ready-made potting mixes which are already optimally designed for growing. But if you’re going the organic way, you can choose from the four different types of soils: silty, sandy, clay, and loamy. Each type has its distinct characteristics, including its advantages and disadvantages.
- Silty Soil
Medium coarse
Advantage: good water retention, contains nutrients and minerals
Disadvantage: fair drainage - Sandy Soil
Coarse
Advantage: good drainage, loose, easy to till, low pH level
Disadvantage: poor water retention - Clay Soil
Fine particle size
Advantage: contains nutrients, good water retention
Disadvantage: poor drainage, compact, heavy, hard to till, high pH level - Loamy Soil
A mixture of silt, sand, and clay
Advantage: great water retention and drainage, contains nutrients
Disadvantage: expensive
Growing Cannabis from Seed
If you have already chosen which soil is best for your cannabis seeds, then it is finally time. This is truly a win-win activity because not only will you get to do something enjoyable that will help ease your stress, but you will also get to harvest good results, literally! You will soon find out that growing cannabis from seed is not that difficult. It will be fun and exciting! This post will give you a step-by-step guide in growing your cannabis seeds.
Ready, Set, Plant!
Step 1: Choose either Indoor or Outdoor Cultivation
Choosing where to station your growing space is one important step. You can grow your seeds either indoors or out. If you want more discreet cultivation, you can opt for indoor cultivation. In this way, you can also have more control over the growing conditions. However, this means that you will also have to make sure that these conditions are optimal for your cannabis to grow at its best state. As the plants start to grow, it is important to keep the temperature a bit warm, like 70°F-85°F. During the flowering stage, you can lower the temperature to 65°F-80°F. More growers tend to produce dank buds when they grow cannabis seeds indoors.
Meanwhile, when you are on a tighter budget, you can opt for outdoor cultivation. In this way, you don’t have to buy grow lights or control the temperature and humidity levels. You just have to pick the right environment with the right climate for your cannabis seeds. When it is too hot, you’re going to have to water your plants and when it’s too rainy, you’re going to have to protect your plants from getting all soaked up. Outdoor growing can be less of a hassle. However, you will have to look out for possible pollination, privacy, bugs, animals, and other people stealing your plant!
Step 2: Choose Your Grow Light
Light is a key player in getting good-quality cannabis. The following are the most common different types of grow lights:
- The Sun
- LED
- LEC (CMH)
- Metal Halide (MH)
- High-Pressure Sodium (HPS)
- Compact Fluorescent Light Bulbs (CFL)
- Other Fluorescent Lighting (T5 / T8)
The most abundant and cheapest source is the sun. Growers are advised to let their plants get at least 8 hours of direct sunlight every day. The best time to do this is from 10 am to 4 pm.
Aside from the sun, growers can also use cheap growing lights like Compact Fluorescent Light Bulbs (CFLs) or household LEDs, though these lights are not intended for growing cannabis seeds, but they are better than nothing.
When your cannabis seeds are already turning into seedlings, T5/T8 fluorescent lighting can be a good choice to provide your plants with lower light intensity. As the plant flowers, you will have to shift to a more powerful light, like a Ceramic Metal Halide (CMH) which has a more natural color–perfect for diagnosing any condition that your plant may develop while growing. This type of light is known to produce significant UV levels which are known to possibly induce trichome production.
If you plan to opt for a more powerful light, then LED is your choice. This light is sophisticated enough to be the only grow light to have seen huge technological research and development for the past decade. This one is relatively more expensive though, but that’s only because they are really great to use when you grow cannabis seeds.
Another grow light that has gained praise from cannabis growers is the Metal Halide (MH). This one is typically combined with High-Pressure Sodium (HPS) which is used by most commercial indoor growers. They are worth the cheap price!
Step 3: Choose Your Grow Medium
Different growing media require varying degrees of care and watering. You can grow your cannabis seeds on soil, soilless mix, hydroponics, aeroponics, or aquaponics. When growing on soil, you can have an organic composted super soil or you can choose to buy soil mixes that already contain nutrients. Just make sure to choose the best soil for growing cannabis seeds. Going for a soilless mix means going for anything but soil, like perlite, coco coir, vermiculite, and many others. Growing your cannabis directly on water or hydroponics will make the plants grow faster and yield larger especially when partnered with LED/HID/LEC grow lights. Some less common types of growing media are aeroponics or growing the plants with the roots suspended in misted air and aquaponics or growing the plants in a tank with fish. You can choose to grow cannabis seeds on any of these media.
Step 4: Choose Your Plant Nutrients
Choosing your plant nutrients depends also on which medium you chose to grow your plant on. There are ready-made nutrient mixes that are specifically for soil growers and there are also those for soilless and hydroponics growers. It is important to remember that even though you’ve started growing on amended soil, the nutrients of that soil will only last for about 4 weeks so adding nutrients manually during the flowering stage is a must.
You also need to watch out for nutrient burn. This happens when you overwhelm the plants with so many nutrients.
To avoid nutrient problems, you also need to maintain the pH level of your root system. An imbalance of pH levels can lead to nutrient deficiencies. PH test kits are being sold commercially for this purpose. When growing on soil, you must maintain the pH levels within 6.0 to 7.0 while on hydroponics, 5.5 to 6.5.
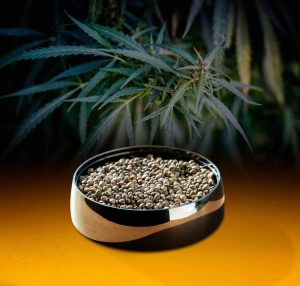
Step 5: Choose your Strain
Choosing your strain can be the most challenging yet exciting part. Since you’ve finally decided to grow cannabis seeds on your own, you will now have the chance to make the cannabis garden of your dreams! You have the freedom to choose any strain you like! If you’re wondering where to get the seeds from, look no further! Beaverseeds is at your service! Call them now at 1-833-688-8581 and secure your favorite cannabis seeds!
- Avail of the FREE SHIPPING promo when you buy at least $200 worth of cannabis seeds!
- Avail of the FREE SHIPPING + FREE 10 premium cannabis seeds promo when you buy at least $420 worth of cannabis seeds!
You can order, pay and receive the products at the comforts of your home! You can pay using your desired payment method among the following:
- Buy cannabis seeds with a credit card
- Buy cannabis seeds with bitcoin
- Buy cannabis seeds with cash
Step 6: Germinate your Cannabis Seeds
If you have intentions of growing cannabis from seed, then you have to germinate them first. There have been many methods used to germinate cannabis seeds. For beginners, the Rapid Rooter can be of great help. It’s a specialized starter cube where you put the seeds directly. You just have to keep it moist and warm, but not soaking. You can also put it on a seedling heat mat. You can see the seedlings pop in a few days.
Another famous and easy germination method is the Paper Towel Method.
Materials:
- Cannabis seeds from Beaverseeds
- Paper towels
- Water
- 2pcs of plates
- Growing medium
Method:
- Place the seeds on a moistened paper towel. Fold over and place on the plate.
- Cover with another plate to keep moisture locked in. Check regularly to see if seeds have sprouted. Seeds usually sprout in 1 to 4 days, but some may take a week especially for older seeds.
- Make a small hole in the moist growing medium, about 1 inch deep. Place sprouted seed, root down, into the hole. Cover loosely and put down lightly.
- As 2 smooth seedling leaves emerge, place CFL bulbs 2 to 6 inches away. Keep lights on for 24 hours a day.
- The seedling grows two adult leaves, signaling the start of the vegetative stage. Keep adjusting the CFL bulbs to maintain distance.
- If seedlings seem to be stretching upwards, they want more light.
Step 7: Vegetative Stage
The vegetative stage starts when your seedlings grow the first regular set of adult leaves. At this stage, you only need to focus on making the plants big and strong. Start feeding your plants at half the strength of nutrients. Gradually bring to ¾ strength once your plants start to grow vigorously. Only feed at full strength if they are showing that they need more nutrients like lower leaves turning yellow and falling off.
When growing indoors, give your plants 18 to 24 hours of light per day. When growing outdoors, make sure your plants receive as much direct sunlight as they can. The size of your plant at this stage can verily determine the size of your harvests.
Step 8: Flowering Stage
At last! Your plants are growing buds! You will now get to smell the aromas of your favorite cannabis at this stage. You will have to shift to a schedule with 12 hours of light and 12 hours of darkness. Autoflowering cannabis plants will not need any lighting change to flower.
This is also the part when you start to identify the gender of your cannabis plants and rid your garden of the male plants if your seeds are regular. But if your seeds are feminized in the first place, then you will only get to see female plants. You need to pay more focus and attention to your plants at this stage because this is when they are most prone to nutrient deficiencies as they focus all their energy on producing buds.
Step 9: Harvest Time!
Hurray! You’ve made it to the best stage! Harvest time!
When do you know when to harvest your cannabis? You must wait until the buds stop growing white hairs and until 40% of these have darkened and curled in. By this time, your buds will already be exuding aromatic cannabis scents which will leave you salivating. This begins the harvest window of your very own cannabis plant.
- If you want a more speedy and not so potent effect, harvest when 40% of the white hairs have darkened.
- If you want the highest THC levels, harvest when 50%-70% of the white hairs have darkened.
- If you want a more couchlock and anti-anxiety effect, harvest when 80%-90% of the white hairs have darkened.
How to harvest? Simply cut down the plant in the most convenient way for you!
Step 10: Dry and Cure the Cannabis Buds
After fulfilling your dream of harvesting your homegrown cannabis buds, you may need to hang them upside down in a dark and cool place with great ventilation to dry them up. For best results, you may want to dry your buds slowly and regularly check for molds or overdrying. You have come this far to waste your weed now!
You’ll know when the buds are dry enough when its thin stem snaps. You can now start curing your buds. First, you put them in a tightly closed jar, about ¾ full, and keep them in a cool dark place. For the first 2 weeks, open the jar once a day for a few seconds just to let your buds breathe and release any moisture. After that period, you can open the jar once a week instead of every day. Many people cure their buds for at least one month. But you can have your own preference. After all, you cultivated that one from seeds!
Now, to answer the FAQs previously mentioned above:
How to start growing cannabis seeds? Scroll up, follow the steps and start now! Start your growing journey at Beaverseeds! Call them now at 1-833-688-8581 and secure your cannabis seeds!
How long to grow cannabis from seed?
Depending on the strain of your cannabis seeds, growing can take 6 to 10 weeks. There are also many factors that affect the speed of your plant growth like the temperature, the kind of grow light you use, and your degree of care and attention to it.
What are the best cannabis seeds to grow indoors?
The best cannabis seeds to grow indoors are those that thrive best under controlled environments. Short strains, not resistant to pests and diseases, and less pungent strains are the best seeds to grow indoors. Beaverseeds can give you a more specific answer to that. You can call them now at 1-833-688-8581.
Share this post
Facebook
Twitter
LinkedIn
Pinterest
News and Growing Tips


Mastering the Art of Growing Sour Diesel: A Comprehensive Guide
August 19, 2024
No Comments

Indulging in the World of Weed Pudding: A Delightful Cannabis Dessert
July 9, 2024
No Comments


January 17, 2025
No Comments

November 14, 2024
No Comments

November 5, 2024
No Comments

October 23, 2024
No Comments

October 14, 2024
No Comments
Search

Popular Articles
Where to Buy Marijuana Seeds in Mount Vernon Washington, USA?
April 11, 2021
No Comments
Where to Buy Marijuana Seeds in Liberty Lake Washington, USA?
April 10, 2021
No Comments
Where to Buy Marijuana Seeds in Kent Washington, USA?
April 9, 2021
No Comments
Where to Buy Marijuana Seeds in Federal Way Washington, USA?
April 8, 2021
No Comments
Where to Buy Marijuana Seeds in Everett Washington, USA?
April 7, 2021
No Comments
Where to Buy Marijuana Seeds in Ellensburg Washington, USA?
April 6, 2021
No Comments
Where to Buy Marijuana Seeds in Brewster Washington, USA?
April 5, 2021
No Comments
Where to Buy Marijuana Seeds in Vancouver Washington, USA?
April 3, 2021
No Comments

Where to Buy Marijuana Seeds in Seattle Washington, USA?
April 3, 2021
No Comments
Where to Buy Marijuana Seeds in Mason Ohio, USA?
April 2, 2021
No Comments